Local Mum Amy blogs for us about craft ideas for kids to make
June
19 Easy Craft Ideas for Kids to Make at Home [Using Everyday Items]
Keeping the kids entertained is at the forefront of everyone’s minds currently and crafting is a brilliant way to do that.
Getting crafty with your kids is a fantastic way to spend bonding time together and many craft activities have hidden cognitive benefits; it can help provide an outlet for their emotions as well as helping with their fine motor and dexterity skills. The list of positives for crafting with children is endless.
But what if you’re not crafty yourself?
Well, fear not, in this article I'm going to give you a few ideas for crafts you can do with your kids. They’re all super simple so that absolutely anyone can create something brilliant!
Here are 19 super simple, fun, and creative crafty ideas.
Contents:
- 1. Leaf Collage
- 2. Homemade Playdoh
- 3. Sock Puppets
- 4. Monster Truck Painting
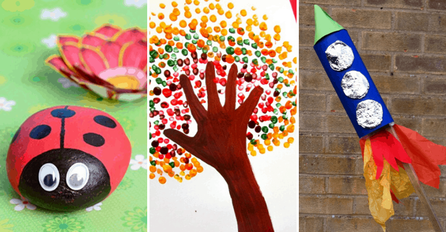
- 5. Toilet Roll Rockets
- 6. Paper Plate Turtle
- 7. Ladybird Rocks
- 8. Fire Breathing Dragon
- 9. Paper Plate Masks
- 10. Egg Carton Caterpillar
- 11. Tin Can Windsocks
- 12. Bumblebee Windsocks
- 13. Pasta Necklace
- 14. Easy Windchimes
- 15. Dreamcatchers
- 16. Fingerprint Trees
- 17. Tissue Paper Streamer Rainbows
- 18. Stained Glass Window
- 19. Pipe Cleaner Snakes
- Summary
1. Leaf Collage
This is a super simple make, which has the bonus of encouraging kids to get outside exploring in nature too!
What you’ll need:
- Paper
- Glue
- Leaves
- Coloring pencils
Get the kids outside exploring the garden and ask them to collect some leaves. (Fallen, slightly dried out leaves work best for this). Encourage them to try and get as many different shapes and colors as they can.
When they are done it’s time to start creating! Use the leaves to make as many different animal pictures as they can think of; maybe the leaves can become part of a lion’s mane? Or a squirrel’s tail? If they’re feeling really adventurous, get them to create a self-portrait using only the leaves they have collected!
2. Homemade Playdoh
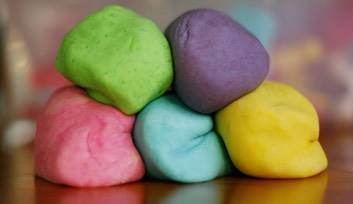
This is a great, classic kids craft that will keep them entertained for hours. Lots of people buy ready-made playdoh from the shop, but it’s far cheaper to make your own, and when it’s this simple there really is no excuse!
What you’ll need:
- 2 cups of water
- 2 cups of flour
- 1 cup of salt
- 2 tbsp cream of tartar
- 2tbsp cooking oil
- Food coloring (optional)
Place all the ingredients into a pan and heat slowly until the mixture thickens and comes away from the side of the pan. Leave to cool before using. Even better, when stored in an airtight container this playdoh can last for ages and be used time and again.
3. Sock Puppets
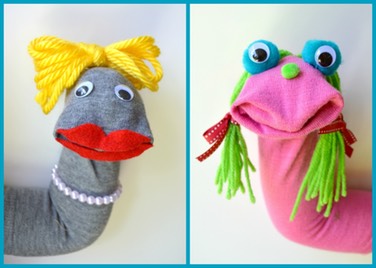
Image Source: takingcareofmonkeybusiness.com
Puppets are always a favorite and are brilliant for encouraging imaginative play! Make a whole cast of puppets and create a show for the whole family to get involved with! There are loads of different types of puppets, and they are all relatively simple to make, but my favorite type of puppet is the sock puppet!
You will need:
- A sock
- Strong glue (suitable for fabric)
- Scissors
- Googly eyes
- Bits of felt or foam or any other old material
- Any additional bits for decoration
Once you’ve gathered all your bits together, actually making the puppets is the easiest bit! Simply decide on your character and stick your eyes, ears, and everything else to the sock. Make sure the glue is strong enough and has properly dried, otherwise all the bits will fall off when you try to use them!
4. Monster Truck Painting
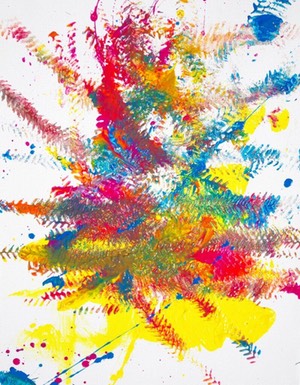
Image Source: happinessishomemade.net
This craft can be a bit messy, but that is all part of the fun…right?!
You will need:
– Paper
– Paint
– Toy cars/ trucks
In my experience, kids love nothing more than getting creative and making a mess, and that is exactly what they get to do with this next craft. Just make sure you’ve put plenty of paper down to protect your table (or even better, if it’s a nice day let them paint outside). They’ll have loads of fun creating their own patterns and making art. Just make sure you send the cars to the car wash afterward!
5. Toilet Roll Rockets
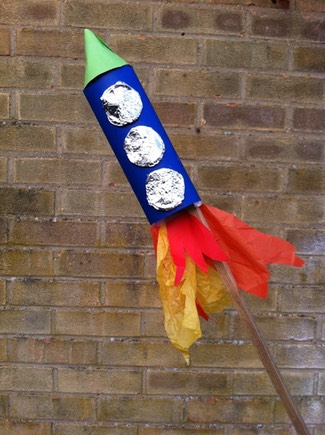
Image Source: mykidcraft.com
This craft is a great way to get kids interested in learning about the solar system and it’s not just for boys!
You will need:
- Toilet roll
- Card
- Paint
- Scissors
- Glue
- Tissue paper
- Silver foil
Firstly, you’ll need to paint the toilet roll, then cut your card into a circle and wrap it around until it makes a cone shape. Glue this to the body of your spaceship.
Cut 3 small circles in your foil and stick them onto your ship to create your rocket windows. Then cut 2 small triangles out of your card and cut 2 slits at the bottom of your roll to attach them to your rocket. Add the tissue paper streamers and any other decorations and you’ll be ready for lift-off.
6. Paper Plate Turtle
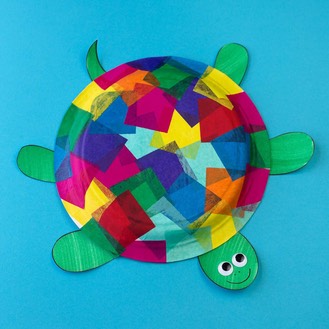
Image source: wonderfuldiy.com
I love creating anything to do with animals and this craft is fantastic for being able to create a whole zoo.
You will need:
- Paper plate
- Tissue paper (cut into squares)
- Glue
- Scissors
- Googly eyes
- Green coloring pencils/ paints
- Black marker
- Double-sided tape
Turn your paper plate upside-down and cover it with a layer of glue. Take some of your tissue paper squares and spread them over your plate.
Then draw and cut out your turtle’s head, legs, and tail. Color them in green and attach them to your plate using double-sided tape. Stick down your googly eyes and draw on a nose and mouth.
A turtle isn’t the only animal you can make using paper plates, you could try making snails, lions, jellyfish, or even a unicorn!
7. Ladybird Rocks
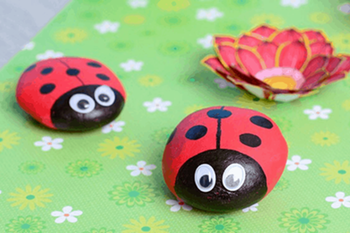
Image source: thedestinyformula.com
This is another craft great for getting the kids out in the garden and collecting things they’ll need.
You will need:
- Rock
- Paint
- Googly eyes
- Glue dots
Firstly, paint your rock red. Once dry, decide which part of the rock will be the head and paint it black. Add the spots and a line down the middle. Add glue dots to the head and attach the googly eyes.
Instead of painting your ladybird red, you could opt for a different color, how about a blue or purple ladybird? Or even make a whole menagerie of different bugs by making rock bees or spiders!
8. Fire Breathing Dragon

Image source: onelittleproject.com
This craft is great fun for all the family!
You will need:
- Toilet paper roll
- Paint
- Googly eyes
- 2 small pompoms
- 2 medium pompoms
- Glue dots
- Glue stick
- Tissue paper in red, yellow and orange.
First, paint your toilet roll and then attach your two small pompoms as his nose and two medium pompoms as his eyes, using the glue dots. Attach your googly eyes onto your medium pompoms and you’re almost there.
Cut your tissue paper into strips and stick them into the mouth of the dragon (avoid sticking them to the bottom of the mouth, they don’t work as well!). Then take a deep breath, place your mouth on the end, blow and watch those flames dance!
9. Paper Plate Masks

Image source: crafts4toddlers.com
An easy way to keep kids entertained is to get them to dress up and role-play as a character. But what do you do if you don’t have any costumes handy? Make a mask of course! The bonus with this craft is that the kids can choose exactly which character they want to make, it really stretches their imaginations.
You will need:
- Paper plate
- Card
- Glue
- Scissors
- Colors/ paints
- Straw (or something to use as a stick)
- Anything else to help decorate your masks
Decide what animal/ character you want to make. Cut the plate in two, it’ll need to be a little bit more than half. Mark where you’ll need the eyes and cut them out. Paint your mask and cut out and add any ears, noses, or other decorations. Glue the straw to the back of your mask to form a handle. Have fun creating your character!
10. Egg Carton Caterpillar
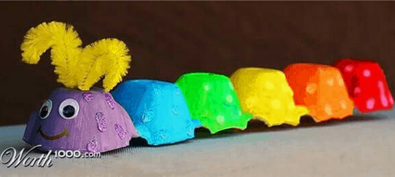
Image source: worth1000.com
A great way to make use of all those spare egg cartons, and amazingly easy to make!
You will need:
- Egg carton
- Paint
- Googly eyes
- Black marker
- Pipe cleaners
Cut your egg carton lengthways and paint it whatever color you desire. Add the googly eyes and draw on a little nose and smile with the marker. Cut a pipe cleaner in half and poke 2 holes into the head and thread through 1 half of the pipe cleaner into each hole as an antenna. Add any other decorations as desired. What other animals can you make using just egg cartons, paint, and pipe cleaners?
11. Tin Can Windsocks
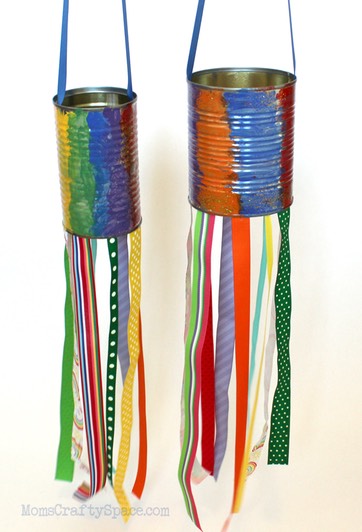
Image source: momscraftyspace.com
This is a great craft for keeping kids entertained. They’ll love hanging their handiwork out in the garden and watching it blow and the ribbons dance in the wind.
You will need:
- Recycled tin can
- Paints (acrylics work best)
- Ribbons
- Tacky glue
- Masking tape/ duct tape
- Optional embellishments
Firstly, make sure your cans are safe to work with by lining around the edges with a couple of layers of your tape, this will help prevent any injuries from sharp edges!
Paint your can in the colors of your choice. As soon as your paint is dry add your ribbons to the bottom of the can using your glue (you could even add a ribbon to the top of your can for hanging). Add any other decorations, and there you have it; your very own tin can windsock!
12. Bumblebee Windsocks

Keeping along our windsock theme here is another fun craft, with the added benefit of being great for learning about a variety of insects.
You will need:
- Toilet paper roll
- Tissue paper
- Scissors
- Glue
- Googly eyes
- Pipe cleaners
- Markers
- Tape
Start by painting your toilet roll yellow and adding the black stripes. Then cut out some wings and attach them. Cut the pipe cleaner in half and tape them to the top of your toilet roll as some antenna. Glue your googly eyes and draw a friendly face. Cut out some strips of tissue paper and glue to the bottom of your windsock. Add a handle using some ribbon, hang your friendly bee windsock somewhere, and get started on making another one. What about a butterfly this time?
13. Pasta Necklace
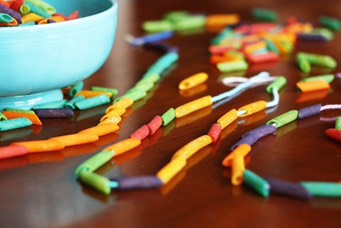
Image source: cbc.ca/parents
Everyone loves jewelry and these pasta necklaces are no exception. They can be made to accessorize any outfit!
You will need:
- Uncooked pasta (hollow)
- Food coloring
- Vinegar
- Plastic container with lids
- Cooling rack
- Length of yarn
It’s really simple to dye your pasta, simply place the pasta into your food container and add in a mixture of vinegar (1 tbsp) and food coloring (several drops). Then shake your container. Pour the pasta out in a single layer onto your cooling rack to dry. Once dry, you can start threading; firstly tie a piece of pasta onto the end of your yarn to prevent the pasta falling off, create your necklace, and once you’re happy with it untie the pasta and retie the ends back together. Super simple and very pretty!
14. Easy Windchimes
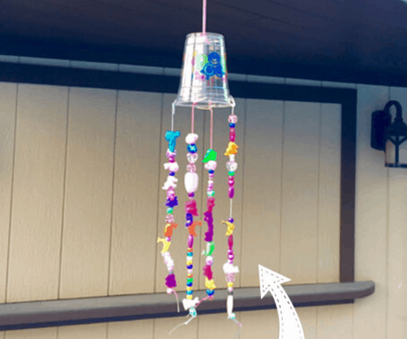
Image source: theinspiredhome.org
Windchimes are always a great favorite and look fantastic hanging out in the garden or up in a window.
You will need:
- Plastic cup
- String or ribbon
- Beads
- Scissors
Turn your cup upside-down, then use your scissors to create 4 evenly spaced holes in the bottom of the cup. Next, slide a length of string through each of the holes and knot them. Then let them get creative threading the beads onto each strand. Knot the end of each strand as they finish. In order to hang, poke another hole into the top of your cup and attach more string. What makes this version of a windchime great is that it’s mainly silent, so if you’re not a fan of noisy decorations, this is perfect!
15. Dreamcatchers
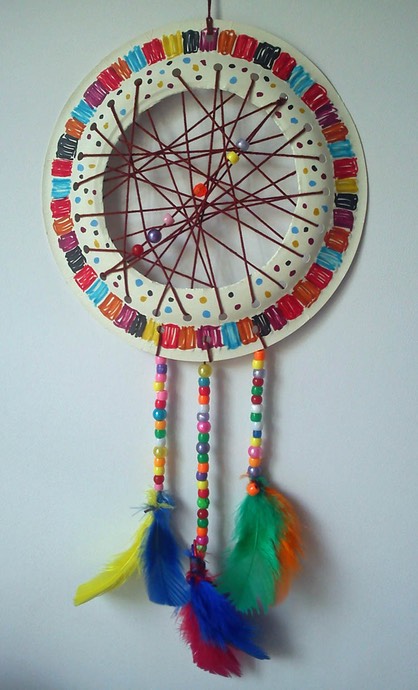
I used to love dream catchers (in fact I still own one or two), they’re extremely pretty and surprisingly simple to make.
You will need:
- Paper plates
- Felt markers
- String or wool
- Glue
- Feathers and other embellishments
Cut a hole in the center of your paper plate and decorate it. Poke holes around the edge of your plate and thread the string. Attach the string to the bottom of the plate. Then decorate away, attaching feathers, beads, and jewels to make them unique!
16. Fingerprint Trees
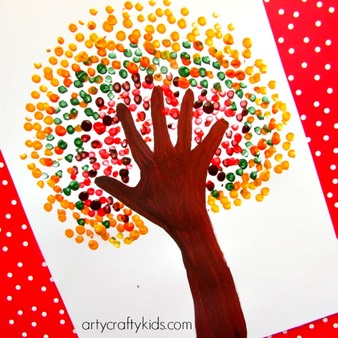
Image source: artycraftykids.com
A slightly messy craft that’s probably best done outdoors! Finger painting has always been a favorite.
You will need:
- Paint
- Paper
This is a super simple craft. First, draw around the hand and arm to make the ‘trunk’ and ‘branches’ of your tree. Paint brown. Then it’s time to get messy! Using fingers add on lots of leaves and other details to your pictures.
17. Tissue Paper Streamer Rainbows
17. Tissue Paper Streamer Rainbows
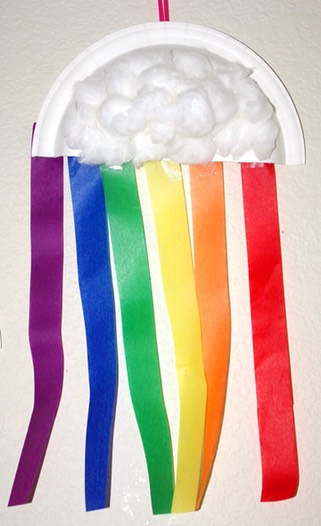
Image source: happinessishomemade.net
At the moment we’re all loving rainbow crafts and these easy to make paper streamer rainbows will look great hanging in your window.
You will need:
- Paper plates
- Cotton wool balls
- Colored tissue paper/ ribbon
- Glue
Start by cutting your paper plate in half, then cut your tissue paper or ribbon into strips and attach them to the back of the plate. On the other side glue on your cotton wool balls to create a fluffy cloud. Super simple and super cute!
18. Stained Glass Window
We all love looking at stained glass windows and admiring their colors, so why not make your own?
You will need:
- Tissue paper (cut into squares)
- Contact paper
- Black construction paper
- Scissors
To make your frame cut out the middle of your construction paper and stick it onto a large piece of contact paper. Then set the kids loose adding their tissue paper in whatever design they like. When they are finished simply stick onto the window and enjoy!
19. Pipe Cleaner Snakes
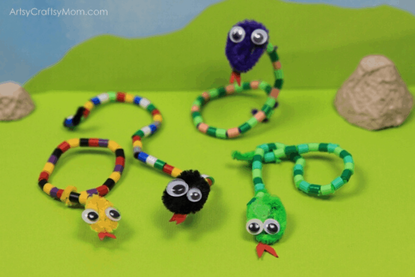
This craft is brilliant for improving fine motor and dexterity in young children. Plus, they make great little bag charms and bookmarks.
You will need:
- Beads
- Pipe cleaners
- Glue
- Googly eyes
- Red felt
- Scissors
Start off by making the head of your snake; take your pipe cleaner and bend it over to form an oval shape without any spaces. Then start adding your beads, try to make a pattern or go completely random. It’s up to you! Once your beads are added, give your snake a face. Cut out a little tongue from the felt and add your googly eyes and you’re all done! The pipe cleaner means you’ll be able to bend your snake into any position you’d like.
Summary
Enjoying crafting with your kids doesn’t have to be a scary prospect, it’s a great opportunity to spend some quality time with them and that’s the main thing they’ll enjoy.
I hope the crafts above have given you plenty of ideas to use in your own kids’ crafting.
Have fun!
Find some more great craft ideas at Easy Peasy and Fun